
Motorcycle Bolts Into Aluminium: How to Avoid Damaged & Stripped Threads
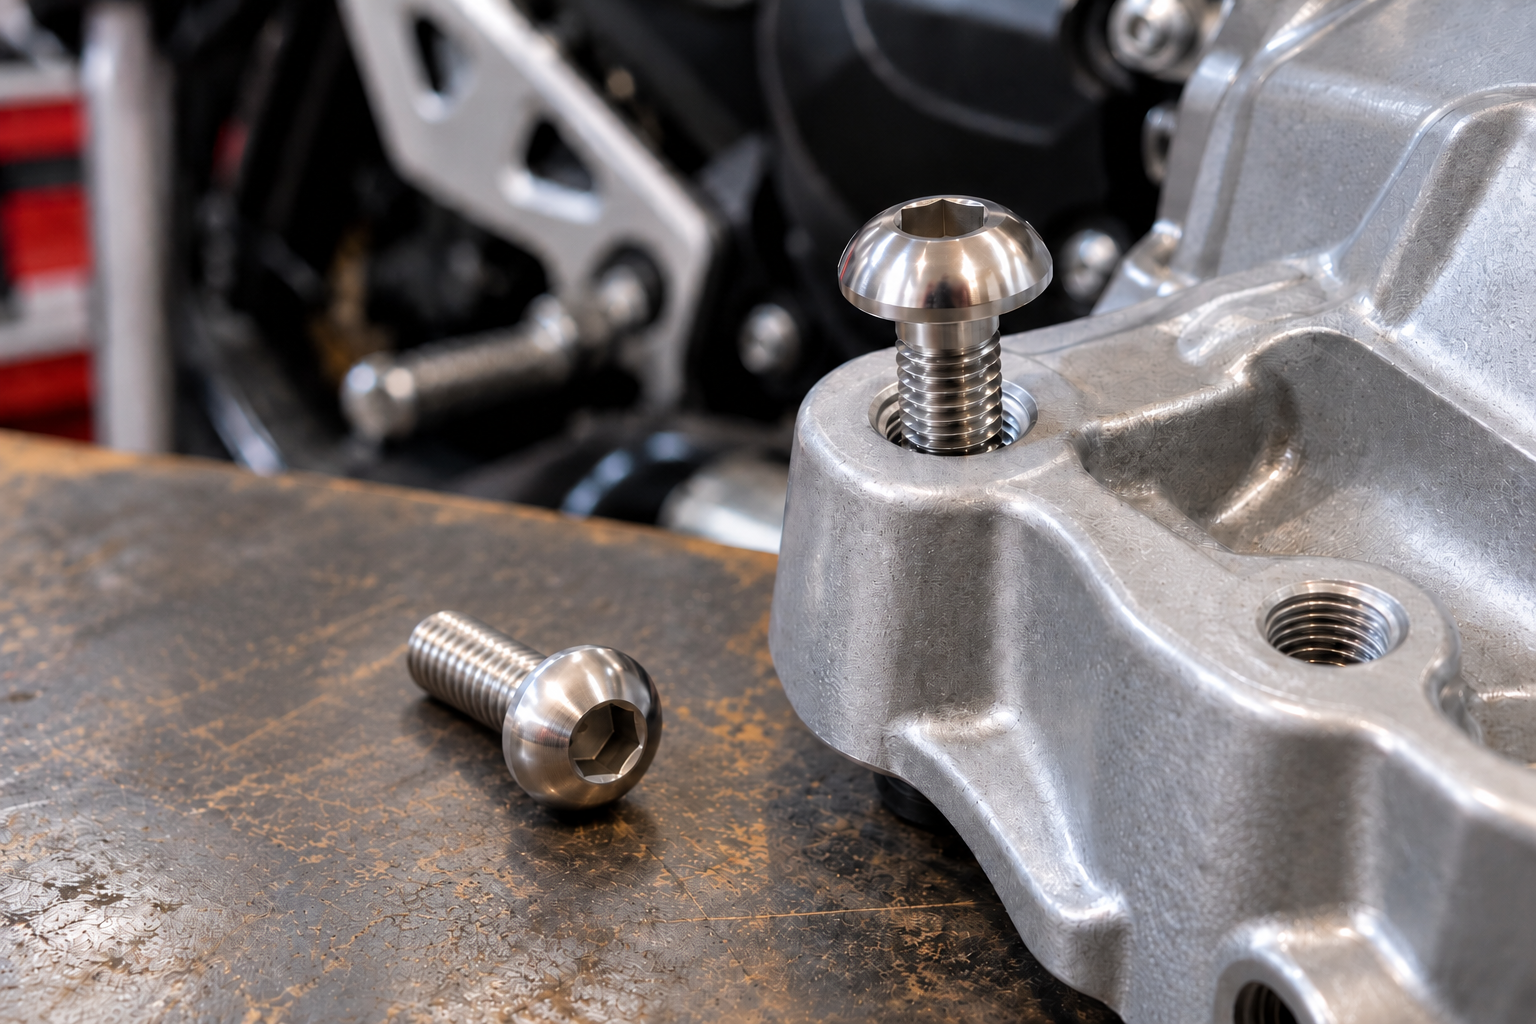
Motorcycle bolts into aluminium need to be fitted carefully because aluminium female threads can be damaged more easily than many steel threads.
Cross-threading, using the wrong thread pitch, fitting a bolt that is too long, overtightening or forcing a contaminated thread can strip or damage an aluminium component.
The correct approach is to identify the fastener properly, inspect and clean the threads, start the bolt carefully, use the correct thread treatment and follow the motorcycle manufacturer’s tightening procedure.
If a bolt does not engage normally, stop rather than forcing it.
Motorcycle Bolts Into Aluminium: The Short Answer
When fitting motorcycle bolts into aluminium:
- Confirm the correct diameter and thread pitch.
- Check the correct bolt length.
- Inspect both male and female threads.
- Clean contamination and old thread treatment where appropriate.
- Start the bolt carefully by hand where access allows.
- Never use tightening force to correct poor alignment.
- Check whether the manufacturer specifies dry threads, lubricant, anti-seize or threadlocker.
- Use the specified tightening torque and procedure.
- Be especially careful with blind threaded holes.
- Stop if the bolt suddenly becomes difficult to turn.
Aluminium threads can be repaired in some circumstances, but avoiding damage in the first place is preferable.
For the complete installation process, see How to Fit Stainless Steel Motorcycle Bolts.
Why Are Aluminium Threads Easier to Damage?
Aluminium alloys are generally softer than the steels commonly used for motorcycle fasteners.
This means the female thread in an aluminium:
- Engine casing.
- Cylinder head.
- Cover.
- Bracket.
- Yoke.
- Caliper component.
- Frame component.
- Other casting.
may be more vulnerable to damage if the fastener is incorrectly installed.
This does not mean aluminium threads are inherently weak or unsuitable.
Motorcycle manufacturers use threaded aluminium components extensively.
When the joint is correctly designed and assembled, they can perform reliably.
Problems usually arise when something about the fastener, thread condition or installation procedure is wrong.
Check the Correct Bolt Before Installation
Before fitting a bolt into an aluminium motorcycle component, confirm that it is the correct fastener.
Check:
- Thread diameter.
- Thread pitch.
- Bolt length.
- Threaded length.
- Head type.
- Shoulder dimensions where applicable.
- Washers, collars and spacers.
- Material.
- Strength or property class.
- Intended mounting position.
Do not assume that a bolt is correct simply because it begins to screw into the hole.
A slightly incorrect thread can sometimes engage for a short distance before binding and damaging the aluminium.
Our How to Choose the Correct Replacement Motorcycle Bolt guide explains the full identification process.
Check the Thread Pitch Carefully
Two bolts can have the same nominal diameter but different thread pitches.
For example:
- M10 × 1.5.
- M10 × 1.25.
- M10 × 1.0.
All are M10 threads, but they are not interchangeable.
A wrong-pitch bolt may appear to start correctly and then become increasingly tight.
If it is forced, the softer aluminium female thread may be damaged.
Use a metric thread-pitch gauge or reliable manufacturer information where necessary.
See our Motorcycle Metric Thread Pitch Reference Chart for common metric pitches.
Never Force a Bolt That Does Not Start Correctly
Where access allows, begin threading the bolt by hand.
A clean, correctly aligned bolt with matching undamaged threads should normally engage without excessive force.
If the bolt:
- Immediately feels tight.
- Becomes difficult after one or two turns.
- Feels gritty.
- Sits at an angle.
- Repeatedly jumps out of the thread.
- Stops unexpectedly.
Stop and investigate the cause.
Possible causes include:
- Incorrect thread pitch.
- Wrong diameter.
- Cross-threading.
- Damaged threads.
- Dirt or corrosion.
- Old threadlocker.
- Metal debris.
- Poor component alignment.
- The wrong bolt being used in that position.
Using a spanner, ratchet or power tool to overcome unexpected resistance can quickly turn a small problem into a stripped aluminium thread.
What Is Cross-Threading?
Cross-threading occurs when the male and female threads begin to engage incorrectly.
Instead of following the existing thread helix, the bolt cuts or deforms a different path.
This can damage both:
- The bolt.
- The threaded aluminium component.
A cross-threaded bolt often feels unusually tight very early in installation.
It may also sit visibly out of alignment.
Do not continue tightening in the hope that the bolt will straighten itself.
Remove it carefully and inspect the threads.
Component Alignment Matters
Sometimes the bolt is correct but the parts being assembled are not properly aligned.
This is common where a bolt passes through one component before entering an aluminium threaded hole.
If the holes do not line up naturally, using the bolt to pull the components forcibly into position can put sideways load on the fastener and damage the thread.
Where several bolts secure one component, it may be useful to start all of them correctly before final tightening unless the manufacturer specifies another sequence.
Do not fully tighten the first bolt while the remaining mounting holes are badly misaligned.
Clean Aluminium Threads Before Fitting a New Bolt
Inspect the threaded hole before installation.
Look for:
- Dirt.
- Road contamination.
- Old threadlocker.
- Corrosion products.
- Metal fragments.
- Damaged thread crests.
- Signs of previous cross-threading.
- Evidence of a previous thread repair.
A new bolt should not be used as a cleaning tool.
Forcing it through contaminated threads can damage both the bolt and the aluminium.
Use an appropriate cleaning method that does not remove or damage sound thread material.
Be Careful With Taps & Thread-Cutting Tools
A conventional cutting tap removes metal.
That can be useful when deliberately creating or repairing a thread, but it is not automatically the correct tool simply because an existing thread is dirty or tight.
Running a cutting tap through a good aluminium thread unnecessarily can remove material or alter the thread fit.
If the objective is cleaning rather than cutting, use an appropriate method for the particular thread and follow manufacturer or professional guidance.
If the thread is significantly damaged, assess whether a proper repair is required rather than repeatedly cutting more material away.
Why Bolt Length Matters in Aluminium
Correct bolt length is particularly important when a fastener enters a blind aluminium hole.
A bolt that is too short may not provide the intended thread engagement.
A bolt that is too long may bottom out before the joint has clamped correctly.
This can create the misleading impression that the bolt is tight.
In reality, the end of the bolt may simply have reached the bottom of the hole.
Possible consequences include:
- Incorrect clamping.
- Damaged threads.
- Damage at the bottom of the hole.
- Damage to the surrounding casting.
- Incorrect component seating.
Always identify the specified bolt length rather than choosing one simply because it fits into the hole.
For measurement guidance, see How to Measure Motorcycle Bolts.
Blind Holes Need Particular Care
A blind hole is a threaded hole that does not pass completely through the component.
These are common in motorcycle aluminium castings.
Before fitting the bolt, check that the hole is not packed with:
- Oil.
- Grease.
- Coolant.
- Water.
- Cleaning fluid.
- Excess threadlocker.
- Anti-seize.
- Dirt.
- Other debris.
A bolt advancing into a blind hole can trap material beneath it.
Liquids are effectively incompressible, so a heavily filled blind hole can develop hydraulic pressure as the bolt is screwed in.
Depending on the joint and amount of trapped material, this may:
- Prevent the bolt seating correctly.
- Give a false impression of tightening.
- Damage the threads.
- Place unwanted stress on the surrounding component.
Do not deliberately fill a blind threaded hole with lubricant or thread treatment.
Apply only the amount and type specified for the application.
Do Not Blow Contamination Deeper Into the Hole
When cleaning a blind hole, the aim is to remove contamination rather than force it further into the component.
Take care with compressed air because fluid or debris can be projected out of the hole.
Wear appropriate eye protection and consider what may be behind or around the threaded opening.
Some motorcycle components may also contain internal passages where careless cleaning could introduce contamination elsewhere.
Overtightening Can Strip Aluminium Threads
Once the bolt is correctly installed, excessive tightening can damage the female thread.
A stronger bolt does not make the aluminium thread stronger.
If excessive torque is applied, failure may occur in the threaded aluminium component rather than in the bolt.
Possible damage includes:
- Pulled threads.
- Stripped threads.
- Cracked castings.
- Distorted components.
- Damaged sealing surfaces.
Use the motorcycle manufacturer’s specified tightening procedure rather than tightening until the bolt simply “feels tight enough”.
Bolt Strength Does Not Determine the Correct Torque by Itself
Knowing that a bolt is class 8.8, 10.9, 12.9 or a particular stainless property class does not automatically tell you the correct torque for the motorcycle joint.
The correct tightening procedure can depend on:
- Thread diameter.
- Thread pitch.
- Fastener material.
- Aluminium thread design.
- Thread engagement.
- Joint geometry.
- Lubrication.
- Coatings.
- Threadlocker.
- Washers.
- Manufacturer specification.
For more information about mechanical property markings, see Motorcycle Bolt Strength Grades Explained.
Dry, Lubricated or Treated Threads?
Do not automatically apply grease, oil, anti-seize or threadlocker to motorcycle bolts entering aluminium.
The correct condition depends on the particular application.
The motorcycle manufacturer may specify:
- Clean dry threads.
- Oil.
- Grease.
- Anti-seize.
- Threadlocker.
- A pre-treated fastener.
- Another defined installation condition.
The specified thread condition matters because lubricants and thread treatments change friction.
A torque intended for dry threads may produce a different clamp load if the threads are lubricated.
For more information, see Threadlocker vs Anti-Seize on Motorcycle Bolts.
Should Anti-Seize Be Used on Bolts Into Aluminium?
Sometimes it may be appropriate.
It should not be automatic.
Anti-seize can reduce friction and may help reduce galling or difficult future removal in suitable applications.
However, it also alters tightening behaviour.
That means applying anti-seize and then using a torque figure specified for dry threads may produce a different clamp load.
There is no universal percentage torque reduction that can safely be applied to every motorcycle bolt after using anti-seize.
Check the motorcycle manufacturer’s instructions and the anti-seize manufacturer’s technical information.
Our Stainless Steel Motorcycle Bolt Torque, Anti-Seize & Galling Guide covers this in more detail.
Stainless Steel Motorcycle Bolts Into Aluminium
Stainless steel bolts are commonly used with aluminium components in suitable applications.
However, several issues need to be considered.
These include:
- Thread galling.
- Tightening friction.
- Fastener strength.
- Corrosion in aggressive environments.
- Correct thread treatment.
- The original OEM specification.
The fact that a stainless bolt has better general corrosion resistance than an unprotected carbon-steel bolt does not automatically make it a suitable replacement for every OEM fastener.
See Motorcycle Bolt Materials Explained for a comparison of stainless steel, high-tensile steel and titanium fasteners.
Stainless Steel & Galvanic Corrosion With Aluminium
Stainless steel and aluminium are dissimilar metals.
When dissimilar metals are electrically connected and exposed to a suitable electrolyte, galvanic corrosion can occur.
On a motorcycle, moisture containing road salt can provide a particularly aggressive environment.
The actual risk depends on factors including:
- The specific materials.
- Surface finishes.
- Joint design.
- Exposed surface areas.
- Salt exposure.
- Moisture retention.
- Protective coatings.
- Maintenance.
This does not mean that stainless steel and aluminium can never be used together.
They are used together successfully in many applications.
It means the combination should be considered as part of the complete joint rather than assuming corrosion resistance is guaranteed.
Keeping the area clean, particularly after salt exposure, can be useful maintenance.
For stainless-care information, see 304 Stainless Steel Motorcycle Bolts: Corrosion Resistance, Cleaning & Care.
What Is Thread Galling?
Thread galling is a form of adhesive wear.
It can occur when contacting metal surfaces experience high friction and local material transfer.
Stainless threaded fasteners can be particularly susceptible under certain conditions.
Symptoms can include a bolt that:
- Initially turns normally.
- Suddenly becomes difficult to turn.
- Feels as though the threads are dragging.
- Seizes before the intended tightening point.
Do not force a stainless bolt that suddenly begins to bind.
Continuing may result in severe thread damage or a seized fastener.
Threadlocker on Aluminium Threads
Threadlocker may be specified for some motorcycle bolts entering aluminium.
Use the exact type and procedure recommended for the application.
Anaerobic threadlockers normally cure when confined between suitable metal surfaces with air excluded.
Cure behaviour can vary with the materials and surface condition.
Passive surfaces, including some stainless, plated or anodised surfaces, can cure more slowly with certain anaerobic products.
Depending on the threadlocker, the manufacturer may specify:
- Additional cure time.
- A primer.
- An activator.
- Particular surface preparation.
Follow the product manufacturer’s technical instructions rather than assuming every threadlocker cures identically on every metal.
Too Much Threadlocker Can Cause Problems
More threadlocker is not necessarily better.
Excessive product can:
- Spread outside the threaded joint.
- Collect in a blind hole.
- Make future removal more difficult.
- Interfere with surrounding components.
- Create unnecessary contamination.
Apply it according to the product manufacturer’s directions and the motorcycle manufacturer’s procedure.
Aluminium Threads & Thread Engagement
The amount of thread engaged can influence the load the female thread can carry.
However, there is no single universal thread-engagement length suitable for every aluminium motorcycle component.
Required engagement depends on factors including:
- Aluminium alloy.
- Bolt diameter.
- Fastener strength.
- Thread pitch.
- Joint loading.
- Component design.
Do not use a generic rule such as “one diameter is always enough” for every motorcycle application.
Use the original fastener specification and manufacturer information.
Washers Can Affect the Joint
Some motorcycle bolts into aluminium are used with washers, collars or spacers.
These components may:
- Spread the bearing load.
- Maintain alignment.
- Protect the component surface.
- Set spacing.
- Form part of a sealing arrangement.
- Control how the joint clamps.
Do not discard a washer simply because the replacement bolt has a different-looking head.
See Motorcycle Washers, Spacers & Collars Explained for more information.
What If the Aluminium Thread Is Already Damaged?
Stop before repeatedly trying larger amounts of force.
Signs of damage can include:
- The bolt will not start correctly.
- The bolt turns without tightening.
- Aluminium material appears on the bolt.
- Threads are visibly flattened or torn.
- The bolt pulls out under low load.
- A previous repair is visible.
- The bolt sits at an incorrect angle.
The correct repair depends on the component and extent of damage.
Possible professional repair methods can include:
- Recutting a lightly damaged thread where appropriate.
- Installing a threaded insert.
- Replacing the damaged component.
- Another manufacturer-approved repair.
The correct method should be selected for the actual component and application.
Thread Inserts in Aluminium
Threaded inserts are commonly used to repair damaged threads in aluminium components.
Different insert systems exist.
When correctly specified and installed, an insert can provide a serviceable replacement thread.
However, successful repair depends on:
- Correct insert type.
- Correct thread size.
- Accurate drilling and tapping.
- Sufficient surrounding material.
- Correct alignment.
- Application loading.
- Manufacturer repair guidance.
A badly installed insert can leave the fastener misaligned or weaken the surrounding component.
For safety-critical, highly loaded or expensive components, professional repair may be the sensible option.
Safety-Critical Aluminium Threads
Take particular care with threaded aluminium components associated with:
- Brake systems.
- Steering.
- Suspension.
- Wheels and axles.
- Structural mountings.
- Engine internals.
- Other highly loaded assemblies.
A thread repair that might be acceptable on a lightly loaded cover is not automatically suitable for a safety-critical component.
Where the integrity of a critical threaded hole is uncertain, obtain manufacturer or suitably qualified professional advice.
Removing a Seized Bolt From Aluminium
A seized bolt in an aluminium component can be particularly difficult because aggressive removal methods may damage the softer surrounding material.
Possible complications include:
- Rounded bolt heads.
- Broken fasteners.
- Damaged female threads.
- Corrosion between dissimilar metals.
- Thread galling.
- Threadlocker.
Avoid escalating force without first considering why the fastener is stuck.
Our How to Remove Seized, Stuck & Rounded Motorcycle Bolts guide explains a cautious removal approach.
What If Aluminium Comes Out With the Bolt?
If pieces of aluminium or obvious thread material come out attached to the bolt, inspect the female thread carefully before fitting a replacement.
Do not simply install a new bolt and tighten it harder.
The female thread may already have lost part of its load-carrying capability.
If you are unsure whether sufficient sound thread remains, have the component assessed and repaired appropriately.
Do Not Fit a Bigger Bolt as a Quick Fix
Installing a larger bolt is not automatically an acceptable way to repair a stripped aluminium thread.
Increasing the fastener size normally requires deliberate machining and assessment of:
- Available material.
- Hole position.
- Wall thickness.
- Component strength.
- Clearance.
- Original joint design.
An improvised oversized fastener can make a later proper repair more difficult.
Check the Bolt After Removal
If a bolt has been difficult to remove from aluminium, inspect it before reuse.
Look for:
- Damaged threads.
- Aluminium transferred onto the thread.
- Galling.
- Corrosion.
- Distortion.
- Damaged head or drive.
- Stretching.
- Damaged shoulder.
A questionable fastener should not automatically be reused.
See When Should Motorcycle Bolts Be Replaced? for a fuller inspection guide.
Motorcycle Bolts Into Aluminium: Simple Fitting Checklist
Before tightening:
- Confirm the correct fastener.
- Check thread diameter and pitch.
- Check bolt length and blind-hole depth requirements.
- Inspect the male and female threads.
- Remove contamination appropriately.
- Fit any required washers, collars or spacers.
- Check the specified thread condition.
- Start the bolt correctly without force.
- Make sure the components are aligned.
- Follow the specified tightening procedure.
- Stop if the bolt binds unexpectedly.
The safest general rule is simple:
A bolt should not need to be forced into an aluminium thread simply to make it fit.
More Biker Bling Motorcycle Fastener Guides
This guide to motorcycle bolts into aluminium forms part of the Biker Bling technical information library.
For information about thread pitch, bolt measurement, fastener materials, strength grades, torque, threadlocker, anti-seize and replacement-fastener selection, visit our Motorcycle Fastener Guides & Technical Information Hub.
You can also use our Motorcycle Fastener Glossary for explanations of terms including blind hole, thread engagement, clamp load, galling and galvanic corrosion.
Find Motorcycle Fasteners & Bolt Kits
Browse the Biker Bling range of 304 stainless steel motorcycle fasteners and model-specific bolt kits.
Shop Biker Bling Motorcycle Fasteners →
Always check the individual product listing for exact fitment, year coverage and the hardware supplied.
Technical Information Disclaimer
The information on this page is provided as general educational guidance about motorcycle fasteners installed into aluminium components.
It does not provide model-specific thread-repair procedures, torque specifications or fastener requirements and is not intended to replace the motorcycle manufacturer’s workshop manual, component manufacturer’s instructions or advice from a suitably qualified motorcycle technician.
Aluminium alloys, thread dimensions, fastener materials, joint designs, loading and repair requirements vary between motorcycle applications.
Always confirm the correct fastener, thread condition, thread treatment and tightening procedure before installation.
Where a thread is damaged, stripped, previously repaired or part of a braking, steering, wheel, suspension, structural or other safety-critical assembly, obtain appropriate technical advice if its condition or repair suitability is uncertain.
Do not substitute fastener materials, strength classes, dimensions or thread-repair methods without establishing suitability for the particular application.
Nothing on this page is intended to affect your statutory rights or to exclude or restrict any responsibility that cannot lawfully be excluded or restricted.