
Motorcycle Fairing Fasteners Explained: Bolts, Well Nuts, Clips & Fixings
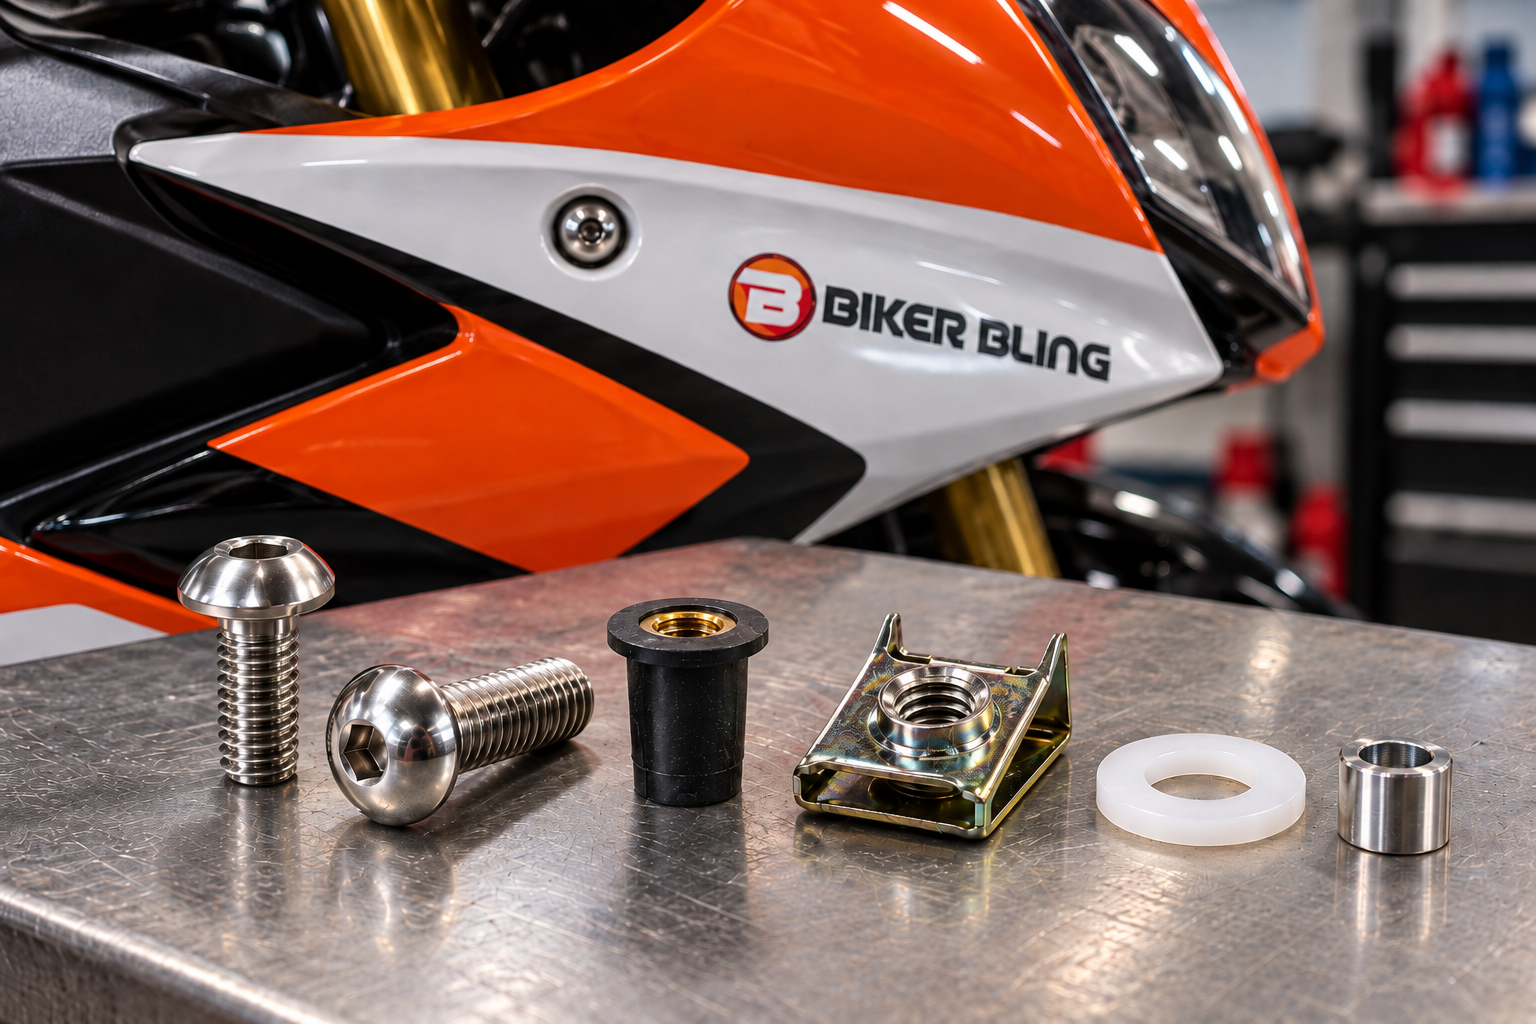
Motorcycle fairing fasteners include the bolts, screws, well nuts, clips, washers, collars, spacers and plastic fixings used to secure a motorcycle’s bodywork.
Although many of these parts look simple, the complete fixing arrangement can affect panel alignment, vibration isolation, appearance and how much load is applied to the plastic.
A replacement fairing bolt therefore needs more than just the correct thread diameter.
Bolt length, head type, shoulder dimensions, washers, clips and the fixing behind the panel can all matter.
What Are Motorcycle Fairing Fasteners?
The term motorcycle fairing fasteners covers the different components used to attach external and internal bodywork to the motorcycle.
Depending on the model, this can include:
- Stainless steel or plated bolts.
- Machine screws.
- Shoulder bolts.
- Well nuts.
- Clip nuts.
- U-nuts.
- Spring clips.
- Plastic push rivets.
- Rubber grommets.
- Nylon or plastic washers.
- Metal washers.
- Collars.
- Sleeves.
- Spacers.
- Special manufacturer-specific fixings.
The visible bolt is often only one part of the complete assembly.
Where Are Motorcycle Fairing Fasteners Used?
Fairing fasteners can be found across many areas of a motorcycle, including:
- Windscreens.
- Nose cones.
- Upper fairings.
- Side fairings.
- Lower fairings.
- Belly pans.
- Inner cockpit panels.
- Tank side panels.
- Tail units.
- Seat cowls.
- Front mudguards.
- Rear huggers.
- Chain guards.
- Headlight surrounds.
- Small trim panels.
Not every motorcycle uses the same type of fixing in each area.
Even two mounting points next to each other can use different bolts, washers or clips.
Motorcycle Fairing Bolts
Motorcycle fairing bolts are usually selected to suit both the mounting point and the surrounding bodywork.
Common variations include:
- Button-head bolts.
- Pan-head screws.
- Socket-cap bolts.
- Countersunk screws.
- Flanged bolts.
- Shoulder bolts.
- Special low-profile fasteners.
The correct head type can affect more than appearance.
It can influence:
- Bearing area.
- Panel clearance.
- Washer fit.
- Tool access.
- How the bolt sits against the fairing.
Our Motorcycle Bolt Head Types guide explains the differences between common bolt head and drive types.
Why Button-Head Bolts Are Common on Motorcycle Fairings
Button-head bolts are commonly used on visible motorcycle bodywork because their low, rounded profile provides a clean appearance and relatively broad contact area.
They can also provide useful clearance where a taller bolt head would be intrusive.
However, a button-head bolt should not automatically replace another bolt simply because the thread matches.
The replacement must still suit the:
- Length.
- Mounting depth.
- Washer.
- Clip or well nut.
- Panel thickness.
- Intended clamping arrangement.
Fairing Bolt Diameter and Thread Pitch
A bolt must match the female thread correctly.
Common motorcycle bodywork fasteners use metric threads, but the diameter alone does not identify the complete thread.
For example, two bolts with the same nominal diameter can have different thread pitches.
Never force a fairing bolt that does not screw into the fixing cleanly.
Doing so can damage:
- Clip nuts.
- Well-nut inserts.
- Aluminium brackets.
- Captive nuts.
- Threaded frame tabs.
- Plastic components surrounding the fixing.
Our Motorcycle Metric Thread Pitch Reference Chart explains common metric thread sizes and pitches.
Why Fairing Bolt Length Matters
Bolt length is particularly important on motorcycle bodywork.
A bolt that is too short may not provide sufficient thread engagement.
A bolt that is too long may:
- Bottom out in a blind hole.
- Contact components behind the fairing.
- Extend excessively through a clip nut.
- Prevent a well nut from working correctly.
- Clamp the wrong part of the assembly.
- Damage surrounding plastic.
- Give a false impression that the joint is tight.
Do not select a replacement simply because the thread screws in.
Measure the original fastener and check the complete mounting arrangement.
See our How to Measure Motorcycle Bolts guide.
Motorcycle Fairing Fasteners With Shoulders
Some fairing bolts include an unthreaded shoulder between the head and threaded section.
That shoulder may:
- Locate the panel.
- Pass through a rubber grommet.
- Work with a collar.
- Control how far the bolt can clamp the panel.
- Maintain clearance around the bodywork.
Replacing a shoulder bolt with a fully threaded fastener can change how the assembly works.
If the original fixing contains a shoulder, do not assume it is decorative.
Our Motorcycle Shoulder Bolts Explained guide covers their purpose in more detail.
Motorcycle Fairing Well Nuts
Well nuts are frequently used on windscreens, fairings and other lightweight panels.
A typical well nut contains:
- A flexible rubber or elastomer body.
- A flange.
- A threaded metal insert.
As the bolt is tightened, the well nut compresses and expands behind the mounting surface.
This can provide a threaded fixing while helping isolate vibration.
The correct well nut must suit the:
- Bolt thread.
- Mounting-hole diameter.
- Panel thickness.
- Grip range.
- Intended application.
Our Motorcycle Fairing Well Nuts, Clips & Washers Explained guide explains these components in detail.
Motorcycle Fairing Clips and Clip Nuts
Metal clips are commonly used where a threaded fixing is required but there is no permanent threaded boss.
These may be described as:
- Clip nuts.
- U-nuts.
- Spring nuts.
- Speed nuts.
- Spire clips.
- Panel nuts.
The exact designs vary.
Some clip over the edge of a plastic or metal tab and provide a threaded point for a bolt.
Others use a formed thread rather than a conventional nut.
The bolt must match the clip correctly.
A visually similar clip is not automatically a direct replacement.
Plastic Fairing Clips and Push Rivets
Plastic push clips are also widely used on motorcycle bodywork.
They may secure:
- Inner fairings.
- Mudguards.
- Undertrays.
- Belly pans.
- Trim pieces.
- Small bodywork panels.
Different designs use different release methods.
Some use a central pin.
Others use an expanding centre or screw-type mechanism.
Trying to remove a push clip incorrectly can break the retaining legs or enlarge the mounting hole.
A damaged push clip should not be replaced with a random screw simply because the screw fits through the hole.
Motorcycle Fairing Washers
Washers used with motorcycle fairing fasteners can perform several functions.
Depending on the design, they may:
- Spread clamping load.
- Protect paint.
- Protect plastic.
- Separate metal components from bodywork.
- Support a rubber grommet.
- Improve appearance.
- Form part of a controlled clamping arrangement.
Fairing washers may be made from:
- Stainless steel.
- Plated steel.
- Aluminium.
- Nylon.
- Plastic.
- Rubber.
- Other suitable materials.
Their dimensions and material should suit the original application.
See our Motorcycle Washers, Spacers & Collars Explained guide.
Fairing Collars and Sleeves
A collar or sleeve may pass through a rubber grommet or fairing mounting point.
Its purpose can be to control the amount of compression applied when the bolt is tightened.
Without the correct collar, the bolt may compress the rubber or plastic much further than intended.
This can result in:
- Distorted bodywork.
- Cracked plastic.
- Crushed grommets.
- Incorrect panel spacing.
- A loose or incorrectly seated bolt.
Small collars should therefore be treated as functional components rather than unwanted spacers.
Motorcycle Fairing Spacers
Spacers maintain the designed distance between a bodywork panel and the component behind it.
They may sit between the fairing and a:
- Frame bracket.
- Headlight mount.
- Tank.
- Subframe.
- Radiator bracket.
- Mudguard mount.
- Cockpit assembly.
Using an incorrect spacer thickness can alter panel alignment.
Several stacked washers should not automatically be used as a replacement for a proper spacer.
Rubber Grommets in Fairing Assemblies
Rubber grommets are commonly used where bodywork needs some isolation from vibration or direct metal contact.
A mounting bolt may pass:
- Directly through the grommet.
- Through a metal collar inside the grommet.
- Through a washer positioned against the grommet.
If the grommet has hardened, cracked or torn, the fixing may no longer behave as intended.
Inspect rubber components whenever the fairing is removed.
Why Motorcycle Fairing Fasteners Are Often Model-Specific
A generic bolt may have the correct diameter and thread but still be wrong for a particular motorcycle.
Model-specific differences can include:
- Bolt length.
- Shoulder length.
- Head diameter.
- Head height.
- Washer diameter.
- Collar dimensions.
- Spacer thickness.
- Well-nut size.
- Clip type.
- Thread pitch.
- Mounting-hole diameter.
This is one reason model-specific kits can be easier to fit correctly than a mixed assortment of generic fasteners.
Our Generic Motorcycle Bolt Kits vs Model-Specific Kits guide explains the differences.
Choosing Replacement Motorcycle Fairing Fasteners
When replacing a fairing fixing, identify as much of the original arrangement as possible.
Check:
- Thread diameter.
- Thread pitch.
- Bolt length.
- Head type.
- Shoulder dimensions.
- Washer type.
- Collar or spacer.
- Well nut or clip.
- Mounting-hole size.
- Intended location.
If possible, compare the replacement with the original parts before installation.
Our How to Choose the Correct Replacement Motorcycle Bolt guide explains the general identification process.
Do Not Assume Every Bolt on the Fairing Is the Same
A fairing panel can contain several visually similar bolts with different lengths.
Manufacturers may vary bolt length because:
- Different brackets sit behind the panel.
- One mounting point contains a spacer.
- One position uses a thicker panel stack.
- One bolt enters a blind hole.
- Another passes through a clip nut.
- Different clearance is required behind the panel.
Mixing these positions during reassembly can cause problems.
When removing multiple fairing fasteners, keeping them organised by position can make refitting easier.
Stainless Steel Motorcycle Fairing Fasteners
Stainless steel is popular for visible motorcycle bodywork because it offers good corrosion resistance and a clean appearance.
Biker Bling commonly supplies 304 stainless steel fasteners for suitable motorcycle applications.
However, the fact that a bolt is stainless steel does not automatically make it suitable for every original fixing.
The replacement still needs the correct:
- Dimensions.
- Thread.
- Head type.
- Shoulder arrangement.
- Mechanical requirements.
- Intended application.
For more information, see our Motorcycle Bolt Materials Explained.
For cleaning and corrosion care, see 304 Stainless Steel Motorcycle Bolts: Corrosion Resistance, Cleaning & Care.
Do Motorcycle Fairing Bolts Need Threadlocker?
Not automatically.
Many fairing fixings do not require threadlocker, while some specific mounting points may have manufacturer instructions that do.
Applying threadlocker without considering the materials involved can create problems.
It may:
- Change thread friction.
- Make later removal more difficult.
- Damage some plastics or elastomers if an unsuitable product is used.
- Cause a small clip or insert to rotate during removal.
Use threadlocker only where appropriate for the specific fixing.
See our Threadlocker vs Anti-Seize on Motorcycle Bolts guide.
Should Anti-Seize Be Used on Fairing Bolts?
Anti-seize should not be applied automatically either.
It alters friction in the threaded joint and may affect tightening behaviour.
On small fairing fasteners, excessive compound can also spread onto:
- Paint.
- Plastic.
- Rubber components.
- Visible bodywork.
Follow the motorcycle or fastener manufacturer’s instructions where available.
For more information, see our Stainless Steel Motorcycle Bolt Torque, Anti-Seize & Galling Guide.
How Tight Should Motorcycle Fairing Fasteners Be?
There is no universal torque for every motorcycle fairing fastener.
The correct tightening method can depend on:
- Bolt diameter.
- Thread pitch.
- Fastener material.
- Female thread material.
- Washer arrangement.
- Well nut.
- Rubber grommet.
- Panel material.
- Manufacturer specification.
Plastic bodywork does not benefit from excessive clamping force.
The purpose of the fixing is to secure the panel correctly, not to tighten it as hard as possible.
Where the manufacturer provides a torque specification or fitting procedure, follow it.
Why Over-Tightening Fairing Bolts Causes Damage
Over-tightening can damage several parts of the assembly.
Possible problems include:
- Cracked fairing panels.
- Distorted mounting holes.
- Crushed rubber grommets.
- Damaged well nuts.
- Stripped clip nuts.
- Pulled-through washers.
- Damaged aluminium threads.
- Rounded bolt heads during later removal.
If a panel remains loose after the bolt has been correctly fitted, investigate the complete mounting arrangement rather than continuing to tighten the bolt.
Why Under-Tightening Can Also Be a Problem
A fastener that is not secured correctly can allow the panel to:
- Vibrate.
- Rattle.
- Move against another panel.
- Wear the mounting hole.
- Damage paint.
- Lose the fixing completely.
Correct installation requires the proper fastener and supporting components.
Do Not Use Fairing Bolts to Pull Panels Into Alignment
If two mounting holes do not line up naturally, investigate why before tightening the bolt.
Possible causes include:
- Incorrect panel position.
- Wrong spacer.
- Missing collar.
- Incorrect bolt in another position.
- Trapped wiring.
- Misaligned bracket.
- Damaged mounting tab.
- Previous accident damage.
- An aftermarket panel with different dimensions.
Using a bolt to force a badly misaligned panel into position can place unnecessary stress into the plastic.
Inspect Mounting Tabs and Holes
Whenever the fairing is removed, inspect the mounting points.
Look for:
- Cracks around holes.
- Enlarged holes.
- Broken mounting tabs.
- Distorted brackets.
- Missing clips.
- Loose captive nuts.
- Split rubber grommets.
- Damaged well nuts.
- Evidence that a previous fastener has been over-tightened.
A new bolt will not repair a damaged mounting point.
The underlying problem should be corrected.
Missing Motorcycle Fairing Fasteners
Riding with missing fairing fixings can allow bodywork to move more than intended.
One missing bolt may transfer additional movement or vibration to surrounding mounting points.
This can contribute to:
- Rattling panels.
- Enlarged holes.
- Cracked tabs.
- Panel-to-panel rubbing.
- Further fasteners becoming loose.
Replace missing components with the correct type rather than using whatever bolt happens to fit.
Corroded Fairing Fasteners
Fairing fixings can be exposed to:
- Rain.
- Road salt.
- Washing chemicals.
- Dirt.
- Moisture trapped behind panels.
Corroded bolts can become difficult to remove.
Corroded clip nuts can also seize onto the bolt and rotate or distort during removal.
If a fastener shows significant corrosion, damaged threads or a badly damaged drive, replacement may be appropriate.
See our When Should Motorcycle Bolts Be Replaced? guide.
Removing Seized Motorcycle Fairing Fasteners
A seized fairing bolt needs careful handling because excessive force can damage the surrounding bodywork.
Before applying more force, consider what the bolt is threaded into.
It may be:
- A metal clip.
- A well nut.
- An aluminium bracket.
- A captive nut.
- A threaded frame component.
The correct removal approach can depend on the fixing behind the panel.
If the bolt head is rounded or seized, see our How to Remove Seized, Stuck & Rounded Motorcycle Bolts.
Replacing a Complete Fairing Fixing
Sometimes replacing only the visible bolt is not enough.
A complete repair may require:
- Bolt.
- Washer.
- Well nut.
- Clip.
- Rubber grommet.
- Collar.
- Spacer.
If the supporting component is worn or damaged, fitting a new bolt into it may not solve the problem.
Treat the fixing as a complete assembly.
Aftermarket Fairings and Fastener Differences
Aftermarket bodywork may not always reproduce the original mounting arrangement exactly.
Differences can include:
- Panel thickness.
- Hole diameter.
- Hole position.
- Recess depth.
- Mounting-tab shape.
An OEM-length bolt that worked correctly with the original panel may therefore need careful checking before use with replacement bodywork.
Do not automatically compensate for a poor fit by tightening harder or enlarging mounting holes.
Cosmetic Fairing Fasteners
Many riders replace visible fairing bolts to improve appearance as well as corrosion resistance.
Cosmetic changes are reasonable where the replacement remains suitable for the original fixing.
Appearance should not take priority over:
- Correct thread.
- Correct length.
- Correct seating.
- Appropriate washer arrangement.
- Required shoulder.
- Proper mounting security.
A good-looking bolt that does not fit the assembly correctly is still the wrong bolt.
Can You Mix Different Fairing Bolt Styles?
Sometimes a different head style may be mechanically suitable, but this should not be assumed.
Changing from one bolt type to another can alter:
- Head diameter.
- Bearing area.
- Tool clearance.
- Washer seating.
- Recess clearance.
- Overall appearance.
Where possible, retain a head style that suits the original mounting arrangement.
Motorcycle Fairing Fasteners: Common Mistakes
Common mistakes include:
- Assuming every fairing bolt is the same length.
- Using the wrong thread pitch.
- Fitting a bolt that is too long.
- Fitting a bolt that is too short.
- Leaving out a washer.
- Leaving out a collar.
- Using the wrong spacer.
- Reusing a badly damaged well nut.
- Fitting the wrong clip nut.
- Replacing a plastic push clip with a screw.
- Over-tightening bolts into plastic bodywork.
- Using bolts to pull misaligned panels into position.
- Applying threadlocker automatically.
- Ignoring cracked mounting tabs.
- Selecting replacements by appearance alone.
Motorcycle Fairing Fasteners: The Simple Rule
When replacing motorcycle fairing fasteners, do not look at the bolt in isolation.
Treat the entire mounting point as an assembly.
Check:
- Bolt diameter.
- Thread pitch.
- Bolt length.
- Head type.
- Shoulder.
- Washer.
- Clip or well nut.
- Rubber grommet.
- Collar.
- Spacer.
- Mounting-hole condition.
- Panel alignment.
If one of these parts is wrong or missing, even the correct bolt may not secure the fairing properly.
Frequently Asked Questions
Are Motorcycle Fairing Bolts Universal?
No.
Motorcycle fairing bolts vary in thread, length, head style, shoulder dimensions and mounting arrangement.
Even bolts used on the same fairing can be different lengths.
What Size Are Motorcycle Fairing Bolts?
There is no single standard size.
The correct size depends on the motorcycle and the individual mounting point.
Measure the original fastener or check reliable model-specific parts information.
Can I Replace Fairing Bolts With Stainless Steel Bolts?
Stainless steel can be suitable for many bodywork applications, but material alone does not determine suitability.
The replacement must still have the correct dimensions, thread and mounting arrangement.
Why Does My Fairing Bolt Keep Spinning?
The problem may be behind the panel rather than with the bolt.
Possible causes include:
- A spinning well nut.
- Damaged clip nut.
- Loose captive nut.
- Stripped thread.
- Incorrect bolt.
Inspect the complete fixing before applying more force.
Why Is My Fairing Still Loose After Tightening the Bolt?
Possible causes include:
- Missing spacer.
- Missing collar.
- Damaged well nut.
- Wrong bolt length.
- Crushed grommet.
- Enlarged mounting hole.
- Damaged mounting tab.
Do not simply keep tightening the bolt.
Can I Use Washers to Make a Fairing Bolt Shorter?
Adding the correct specified washer is normal where the design requires one.
However, stacking random washers to compensate for an incorrectly sized bolt is not a good substitute for using the correct fastener.
Important Safety Information
Motorcycle fairing fasteners are generally associated with bodywork rather than highly loaded structural joints, but incorrectly secured panels can still create safety problems.
Loose or incorrectly fitted bodywork can:
- Detach while riding.
- Interfere with steering.
- Contact moving components.
- Obstruct lights.
- Damage electrical wiring.
- Distract the rider through severe vibration or movement.
Always use the correct fixing for the intended mounting point and follow manufacturer information where available.
Do not substitute fairing fasteners into brake, suspension, steering, wheel, engine or other safety-critical applications unless the replacement has been specifically identified as suitable.
If the fairing or mounting structure is damaged, repair the underlying fault rather than relying on a larger bolt or excessive tightening.
Shop Motorcycle Fairing Fasteners
Looking for replacement motorcycle fairing bolts and model-specific stainless steel fastener kits?
Biker Bling supplies stainless steel motorcycle fasteners and model-specific bolt kits for a range of makes, models and applications.
Shop Motorcycle Fasteners at Biker Bling →
Always check the individual product description, intended fitment and components supplied before ordering.