
How to Fit Motorcycle Fairing Bolts Without Damaging Plastic Panels
Learning how to fit motorcycle fairing bolts correctly can help prevent cracked panels, distorted mounting holes, damaged well nuts and scratched bodywork.
Motorcycle fairings are often secured using a combination of bolts, washers, collars, rubber grommets, well nuts, clips and spacers. The visible bolt is therefore only one part of the complete fixing.
The safest approach is to identify the original mounting arrangement, align the bodywork before tightening and avoid using the bolts to force plastic panels into position.
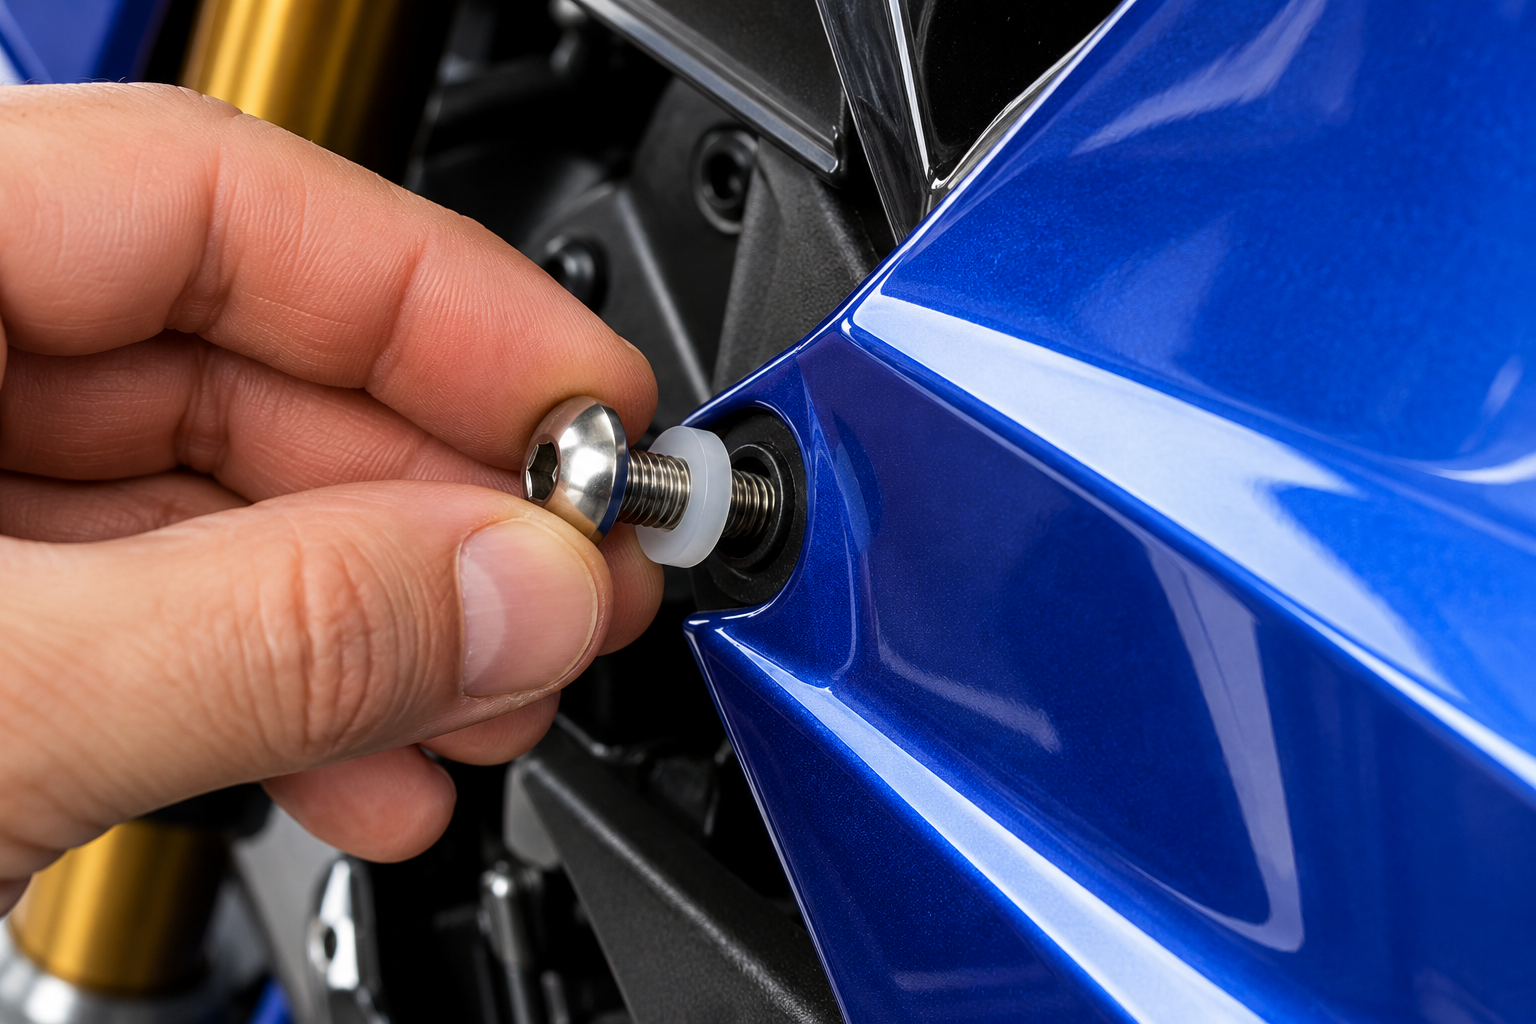
Before Fitting Motorcycle Fairing Bolts
Before installing any fairing bolt, check the complete mounting point.
Look for:
- The correct bolt.
- Correct thread diameter.
- Correct thread pitch.
- Correct bolt length.
- Correct head type.
- Any shoulder on the bolt.
- Washer or protective washer.
- Rubber grommet.
- Collar or sleeve.
- Spacer.
- Well nut.
- Clip nut or captive nut.
- Condition of the mounting hole.
Our Motorcycle Fairing Fasteners Explained guide explains how these components work together.
Identify Where Each Fairing Bolt Belongs
Motorcycle fairing bolts can look almost identical while having different lengths or shoulders.
Do not assume every bolt removed from the same panel is interchangeable.
Manufacturers may use different fasteners because:
- One mounting point passes through a spacer.
- One enters a well nut.
- Another screws into a clip nut.
- One position has a thicker panel stack.
- Different clearance exists behind different mounting points.
- A shoulder may be required at one location but not another.
When removing a fairing, keep the fasteners organised by position.
A simple labelled tray or piece of card can make reassembly easier.
Check the Fairing Before Reassembly
Before fitting the panel, inspect it for existing damage.
Look closely around the mounting holes and tabs for:
- Cracks.
- Splits.
- Elongated holes.
- Chipped edges.
- Distortion.
- Previous repairs.
- Missing rubber grommets.
- Broken mounting tabs.
A new bolt will not repair a damaged mounting point.
If the plastic is already cracked or the mounting tab is broken, correct the underlying problem before tightening the panel back into place.
Inspect the Fairing Fasteners
Check the bolts and supporting components before reuse.
Look for:
- Damaged threads.
- Bent bolts.
- Rounded Allen or Torx recesses.
- Corrosion.
- Damaged shoulders.
- Cracked well nuts.
- Worn clip nuts.
- Crushed washers.
- Split rubber grommets.
- Missing collars.
- Incorrect spacers.
Our When Should Motorcycle Bolts Be Replaced? guide explains when a damaged fastener may no longer be suitable for reuse.
Check the Bolt Length
The correct bolt length is important when fitting motorcycle fairings.
A bolt that is too short may not provide enough thread engagement.
A bolt that is too long may:
- Bottom out.
- Contact a hidden component.
- Extend too far through a clip nut.
- Compress a well nut incorrectly.
- Damage the panel or bracket.
- Give the impression that the joint is tight before the panel is actually clamped.
Do not compensate for an incorrect bolt length by stacking random washers.
See our How to Measure Motorcycle Bolts guide if you need to identify the original dimensions.
Check the Bolt Head Type
The bolt head must suit the mounting point.
Motorcycle fairings commonly use:
- Button heads.
- Pan heads.
- Countersunk screws.
- Socket-cap bolts.
- Flanged fasteners.
- Special shoulder fasteners.
A different head style can change the contact area against the panel or washer.
It may also affect clearance or how the bolt sits in a recessed mounting point.
Our Motorcycle Bolt Head Types guide explains the main head and drive types.
Check Well Nuts, Clips and Washers
Many fairing problems are caused by the fixing behind the visible bolt.
A well nut may have become hardened or may spin in the mounting hole.
A clip nut may be corroded, distorted or positioned incorrectly.
A washer may be missing.
A collar may have fallen out when the panel was removed.
Before reassembly, inspect the complete fixing.
Our Motorcycle Fairing Well Nuts, Clips & Washers Explained guide covers these components in detail.
Position the Fairing Before Installing the Bolts
Place the fairing into its natural mounting position before tightening anything.
Check that:
- Mounting holes are reasonably aligned.
- Tabs sit in the correct locations.
- Adjacent panels overlap correctly.
- Wiring is not trapped.
- Hoses are not pinched.
- Rubber grommets remain seated.
- Spacers and collars are in position.
If the panel needs significant force to reach the mounting holes, stop and investigate why.
The bolts should not be used as tools to pull a badly misaligned fairing into position.
Start Motorcycle Fairing Bolts by Hand
Where access allows, begin threading the bolt by hand.
This gives you a better chance of feeling whether the thread is engaging correctly.
A correctly matched bolt should normally begin threading without excessive force.
If the bolt immediately feels tight, stop.
Possible causes include:
- Cross-threading.
- Incorrect thread pitch.
- Damaged thread.
- Misaligned clip nut.
- Misaligned panel.
- Debris in the thread.
- Incorrect bolt.
Do not use a ratchet, Allen key or power tool to force a bolt that will not start correctly.
Do Not Fully Tighten the First Bolt
When a panel is secured by several fasteners, start the bolts loosely before fully tightening them.
This allows the fairing to settle into its intended position.
A sensible sequence is:
- Position the panel.
- Start the main mounting bolts by hand.
- Install the remaining clips, bolts and fixings loosely.
- Check panel alignment.
- Check gaps between neighbouring panels.
- Confirm that collars and washers are correctly seated.
- Tighten the fasteners progressively using the appropriate method.
Fully tightening one bolt before the others are installed can pull the panel out of alignment.
Never Use Fairing Bolts to Force Panel Alignment
If a mounting hole is several millimetres away from the fixing behind it, do not insert the bolt at an angle and use it to drag the panel into place.
Doing so can place unwanted stress around the mounting hole or tab.
Investigate possible causes such as:
- Incorrect panel positioning.
- Wrong spacer.
- Missing spacer.
- Trapped wiring.
- Incorrect fastener already fitted elsewhere.
- Misaligned bracket.
- Damaged mounting tab.
- Incorrect aftermarket bodywork.
- Previous accident damage.
Forcing a panel into alignment with the bolt can damage both the thread and the fairing.
Make Sure the Bolt Is Straight
The bolt should enter the fixing squarely.
If the panel is pulling the bolt sideways, stop and correct the alignment.
Starting a bolt at an angle can damage:
- Well-nut inserts.
- Clip nuts.
- Aluminium threads.
- Captive nuts.
- Threaded brackets.
Where a fairing bolt threads into aluminium, take particular care.
Our Motorcycle Bolts Into Aluminium guide explains the risks of damaged and cross-threaded aluminium threads.
Use the Correct Washers
Washers can protect the bodywork and help spread the clamping load.
Depending on the motorcycle, the specified arrangement might use:
- Metal washers.
- Nylon washers.
- Plastic washers.
- Rubber washers.
- Decorative washers.
- Special shaped washers.
Do not automatically discard the original washer because the replacement bolt has a larger head.
A washer may form part of the designed mounting arrangement.
For more information, see our Motorcycle Washers, Spacers & Collars Explained guide.
Do Not Forget Collars and Sleeves
Some fairing mountings use a metal or plastic collar inside a rubber grommet.
The collar can control how far the bolt compresses the rubber.
If the collar is missing, tightening the bolt may excessively crush the grommet or pull the panel further than intended.
This can cause:
- Distorted fairing panels.
- Cracked plastic.
- Damaged grommets.
- Incorrect panel spacing.
A small collar may look insignificant, but it can be essential to the fixing.
Avoid Concentrated Clamping Force on Plastic
Plastic bodywork can be damaged when too much clamping force is concentrated around a small mounting area.
The correct washer, bolt head, collar or grommet can help distribute the load as intended.
Using an unsuitable bolt head or missing washer may concentrate the load around the edge of the mounting hole.
This can:
- Mark the plastic.
- Distort the hole.
- Locally stress the panel.
- Contribute to cracking.
Do not assume that a larger tightening force will make the fairing more secure.
How Tight Should Motorcycle Fairing Bolts Be?
There is no universal torque value for all motorcycle fairing bolts.
The correct tightening procedure can depend on:
- Bolt diameter.
- Thread pitch.
- Fastener material.
- Female thread material.
- Panel material.
- Washer arrangement.
- Rubber grommet.
- Well nut.
- Collar.
- Manufacturer specification.
Where the motorcycle manufacturer specifies a tightening torque or procedure, follow it.
The purpose is to secure the panel correctly, not to tighten the fastener as hard as possible.
Avoid Over-Tightening Fairing Bolts
Over-tightening can damage both the fairing and the fixing.
Possible damage includes:
- Cracked plastic.
- Distorted mounting holes.
- Crushed grommets.
- Damaged well nuts.
- Stripped clip nuts.
- Damaged aluminium threads.
- Deformed washers.
- Rounded bolt heads during later removal.
If the panel is still loose after the fixing has been assembled correctly, find the cause rather than simply tightening harder.
Do Not Leave Fairing Bolts Too Loose
Under-tightening can also cause problems.
A loose panel may:
- Rattle.
- Vibrate.
- Rub against adjacent bodywork.
- Wear the mounting hole.
- Damage paint.
- Lose a fastener.
Correct fitment means securing the panel using the intended fixing arrangement.
Fitting Motorcycle Fairing Well Nuts
If the mounting uses a well nut, check that it sits correctly in the mounting hole before inserting the bolt.
The rubber body should not be:
- Torn.
- Split.
- Excessively hardened.
- Badly distorted.
- Loose in the mounting hole.
As the correct bolt is tightened, the threaded insert is drawn towards the flange and the flexible body expands behind the mounting surface.
Do not keep tightening simply because the bolt continues to turn.
If the well nut spins or fails to clamp correctly, inspect it.
Fitting Fairing Bolts Into Clip Nuts
Check that the clip nut is properly positioned over the mounting tab.
The threaded section of the clip should align with the panel hole.
If it is offset, the bolt can enter at an angle.
Do not use the bolt to pull the clip into position.
Reposition the clip first.
Replace it if it is:
- Heavily corroded.
- Distorted.
- Cracked.
- Stripped.
- Unable to remain attached to the mounting tab.
Should You Use Threadlocker on Fairing Bolts?
Do not apply threadlocker automatically.
Some fairing fasteners may have manufacturer instructions specifying a locking product, but many do not.
An unsuitable threadlocker may also affect certain plastics or elastomers.
Threadlocker can change thread friction and make future removal more difficult.
If it is specified, use the correct product and quantity.
Otherwise, do not assume it is necessary.
Our Threadlocker vs Anti-Seize on Motorcycle Bolts guide explains the difference between common thread treatments.
Should You Use Anti-Seize on Fairing Bolts?
Anti-seize should not be applied automatically either.
It changes thread friction and can alter the relationship between tightening torque and clamp load.
Excess compound can also spread onto visible bodywork, rubber components or plastic panels.
Follow the manufacturer’s procedure where one is available.
For more information, see our Stainless Steel Motorcycle Bolt Torque, Anti-Seize & Galling Guide.
Fitting Stainless Steel Motorcycle Fairing Bolts
Stainless steel fasteners are commonly chosen for suitable visible bodywork applications because of their corrosion resistance and appearance.
However, the replacement bolt still needs to match the original application.
Check:
- Diameter.
- Thread pitch.
- Length.
- Head type.
- Shoulder.
- Washer arrangement.
- Mounting point.
Do not assume that every original fairing fastener can be replaced simply because a stainless steel bolt fits the thread.
See our How to Fit Stainless Steel Motorcycle Bolts guide for general installation advice.
Protect Painted and Finished Surfaces
Take care around painted or coated fairing panels.
Before tightening:
- Ensure washers are clean.
- Remove grit from beneath bolt heads.
- Check that no metal swarf is trapped against the panel.
- Keep tools from slipping against the bodywork.
- Avoid dragging metal washers across painted surfaces.
Even a small piece of grit trapped beneath a washer can mark a finished surface when the fastener is tightened.
Avoid Power Tools for Final Tightening
Power tools can make fairing work quicker, but they can also apply force very rapidly.
For small bodywork fasteners, this reduces the opportunity to feel:
- Cross-threading.
- A bolt bottoming out.
- A spinning well nut.
- A misaligned clip nut.
- Excessive compression.
Where appropriate, start and finish delicate fairing fasteners by hand using the correct hand tool.
Do not use an impact tool simply to make installation faster.
Aftermarket Fairings May Fit Differently
Replacement or aftermarket fairings may not reproduce every original dimension exactly.
Differences can include:
- Panel thickness.
- Hole diameter.
- Hole position.
- Recess depth.
- Mounting-tab position.
Do not automatically assume the original bolt length or spacer arrangement is correct if the replacement panel differs from the OEM bodywork.
Check the complete assembly before tightening.
If the holes do not align, avoid drilling or enlarging them until you have confirmed that the panel is positioned correctly.
What If a Fairing Bolt Keeps Spinning?
If the bolt turns without tightening, the problem may be behind the panel.
Possible causes include:
- Spinning well nut.
- Stripped clip nut.
- Loose captive nut.
- Damaged thread.
- Incorrect bolt.
- Bolt bottoming out.
- Broken mounting point.
Do not keep turning the bolt indefinitely.
Inspect the fixing.
What If a Fairing Bolt Will Not Come Out?
A seized or damaged fairing bolt needs careful removal.
Excessive force can break:
- Plastic tabs.
- Well nuts.
- Clip nuts.
- Captive nuts.
- Aluminium brackets.
Before forcing the bolt, determine what it threads into.
Our How to Remove Seized, Stuck & Rounded Motorcycle Bolts guide explains general removal techniques.
Check the Fairing After Installation
Once the bolts have been fitted, inspect the complete panel.
Check that:
- All required fasteners are installed.
- Panel gaps look correct.
- The fairing is not visibly distorted.
- Washers sit flat.
- Rubber grommets remain correctly seated.
- Bolts are not obviously pulling the panel sideways.
- No wiring or hoses are trapped.
- The panel does not interfere with steering or moving components.
On panels near the handlebars or front wheel, carefully check clearance through the appropriate range of movement before riding.
Recheck After Initial Use Where Appropriate
If bodywork has been extensively removed and refitted, it can be sensible to inspect it again after initial use.
Look for:
- Loose fasteners.
- Unexpected movement.
- New rattles.
- Panel rubbing.
- Displaced clips.
- Well nuts pulling through mounting holes.
If something has moved, determine the cause rather than automatically tightening every bolt further.
How to Fit Motorcycle Fairing Bolts: Common Mistakes
Common mistakes include:
- Mixing different bolt lengths.
- Forcing the wrong thread.
- Starting bolts with a power tool.
- Fully tightening the first bolt before aligning the panel.
- Using bolts to pull a misaligned panel into position.
- Leaving out washers.
- Losing collars or spacers.
- Reusing badly damaged well nuts.
- Fitting misaligned clip nuts.
- Over-tightening bolts into plastic bodywork.
- Stacking washers to compensate for the wrong bolt.
- Applying threadlocker automatically.
- Ignoring cracked mounting tabs.
- Trapping wires or hoses behind the fairing.
How to Fit Motorcycle Fairing Bolts: The Simple Rule
When you fit motorcycle fairing bolts, align and assemble the panel first, then tighten the fasteners.
Do not use the bolt to create the alignment.
Check:
- Correct bolt.
- Correct mounting position.
- Correct thread.
- Correct length.
- Correct washer.
- Correct well nut or clip.
- Correct collar.
- Correct spacer.
- Panel alignment.
- Mounting-hole condition.
Start the fasteners carefully, allow the panel to settle into position and tighten them using the appropriate manufacturer procedure.
Frequently Asked Questions
Should I Tighten One Fairing Bolt at a Time?
It is usually better to start the relevant fasteners loosely before fully tightening the panel.
This allows the mounting holes, spacers and panel edges to align before the final tightening stage.
How Do I Stop Motorcycle Fairings Cracking Around the Bolts?
Use the correct bolt, washer, grommet, collar and spacer arrangement and avoid excessive tightening.
Existing cracks, missing collars, incorrect fasteners or badly aligned panels should be corrected rather than compensated for with extra clamping force.
Why Will My Fairing Bolt Not Line Up?
Possible causes include:
- Incorrect panel position.
- Missing or incorrect spacer.
- Misaligned bracket.
- Wrong fastener fitted elsewhere.
- Trapped wiring.
- Damaged mounting tab.
- Aftermarket panel differences.
Do not force the bolt into the hole at an angle.
Can I Use Longer Bolts on a Motorcycle Fairing?
Only where the dimensions have been established as suitable.
A longer bolt can bottom out or contact components behind the fairing.
Use the correct length for the individual mounting point.
Should Motorcycle Fairing Bolts Have Washers?
Some do and some do not.
The correct arrangement depends on the motorcycle and mounting point.
If the original design uses a washer, collar, grommet or spacer, retain the appropriate component.
Why Does My Fairing Rattle After I Refit It?
Possible causes include:
- Loose or missing fastener.
- Missing spacer.
- Damaged well nut.
- Crushed grommet.
- Incorrect bolt length.
- Broken mounting tab.
- Incorrect panel alignment.
Inspect the complete mounting arrangement rather than simply tightening every visible bolt.
Important Safety Information
Motorcycle fairings are generally bodywork rather than highly loaded structural components, but incorrectly fitted panels can still create a safety hazard.
Loose or incorrectly installed bodywork may:
- Detach while riding.
- Interfere with steering.
- Contact the wheel or other moving components.
- Obstruct lights.
- Damage wiring.
- Restrict controls.
Always follow motorcycle manufacturer instructions where available.
Do not substitute fairing bolts into brake, steering, suspension, wheel, engine or other safety-critical applications unless the replacement has been specifically identified as suitable.
If mounting tabs, brackets or threaded components are damaged, repair the underlying fault rather than relying on a larger bolt or increased tightening force.
If you are unsure whether the fairing has been fitted safely, obtain assistance from a competent motorcycle technician.
Shop Motorcycle Fairing Bolts & Fasteners
Looking for replacement stainless steel motorcycle fairing bolts or model-specific fastener kits?
Biker Bling supplies stainless steel motorcycle fasteners and model-specific bolt kits for a range of makes, models and applications.
Shop Motorcycle Fasteners at Biker Bling →
Always check the individual product description, intended fitment and components supplied before ordering.