
How to Fit Motorcycle Fairing Bolts Without Damaging Plastic Panels
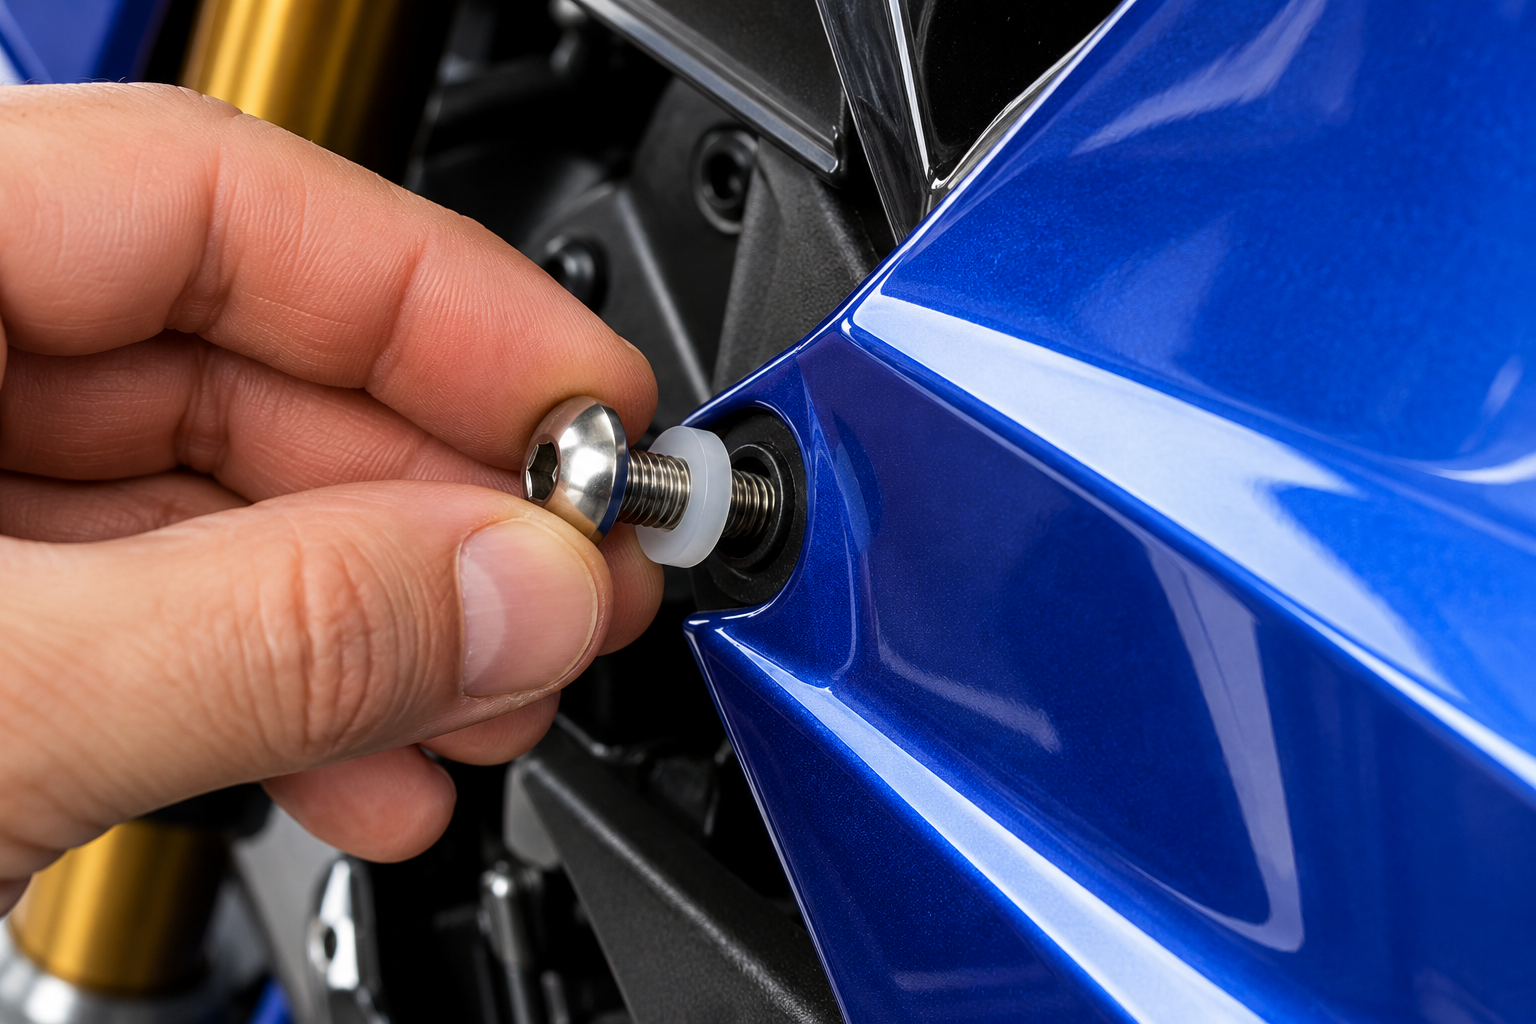
To fit motorcycle fairing bolts without damaging plastic panels, the bodywork should be aligned correctly and secured without cracking the plastic, crushing rubber mountings, stripping clips or forcing panels into position.
The key is to treat each fixing as a complete assembly rather than concentrating only on the visible bolt.
A fairing mounting point may use:
- A bolt or screw.
- A washer.
- A shoulder.
- A rubber well nut.
- A metal clip nut.
- A grommet.
- A collar.
- A spacer.
- A captive threaded insert.
Correct alignment and the correct supporting hardware are just as important as the bolt itself.
This guide explains how to fit motorcycle fairing bolts carefully and how to avoid common problems with plastic panels.
How to Fit Motorcycle Fairing Bolts: The Short Answer
Before tightening any motorcycle fairing bolt:
- Confirm that the bolt belongs in that mounting position.
- Check its diameter, thread pitch and length.
- Inspect the fairing hole, mounting tab and threaded fixing.
- Fit the correct washer, well nut, clip, collar or spacer.
- Position the panel naturally rather than pulling it into place with the bolt.
- Start the fastener carefully by hand where access allows.
- Start several panel bolts before fully tightening any one of them.
- Follow any manufacturer tightening sequence or torque specification.
- Do not continue tightening if the plastic, rubber mounting or fixing begins to distort.
- Carry out a final check that the panel is secure and correctly aligned.
If something does not line up properly, investigate the cause rather than increasing the tightening force.
Before You Fit Motorcycle Fairing Bolts
Take a moment to identify the complete fixing arrangement.
Depending on the motorcycle, the fastener may screw into:
- A rubber well nut.
- A clip nut.
- A captive nut.
- An aluminium bracket.
- A threaded frame tab.
- Another manufacturer-specific fixing.
The components between the bolt head and mounting point can be equally important.
These may include:
- Nylon washers.
- Metal washers.
- Rubber washers.
- Grommets.
- Collars.
- Sleeves.
- Spacers.
Our Motorcycle Fairing Fasteners Explained guide covers the complete range of common bodywork fixings.
1. Confirm That You Have the Correct Fairing Bolt
Do not assume every bolt removed from a fairing is interchangeable.
Two bolts can look almost identical while differing in:
- Length.
- Thread pitch.
- Head diameter.
- Shoulder length.
- Threaded length.
Some panels use several different bolt lengths because the mounting depth changes around the motorcycle.
One fastener may pass through a spacer.
Another may screw into a shallow blind hole.
Another may pass into a clip nut.
Putting the wrong bolt into the wrong position can cause damage even if it initially starts in the thread.
If you are unsure about the replacement, see How to Choose the Correct Replacement Motorcycle Bolt.
2. Keep Fairing Bolts Organised by Position
When removing motorcycle bodywork, keep the hardware organised.
Useful methods include:
- Separate containers for each panel.
- Labelled bags.
- A divided parts tray.
- Photographs of unusual mounting arrangements.
It can also help to distinguish:
- Left and right sides.
- Upper and lower panels.
- Windscreen fixings.
- Inner-panel fixings.
- External visible fasteners.
This reduces the risk of installing a longer bolt into a shallow mounting position during reassembly.
3. Compare New Motorcycle Fairing Bolts With the Originals
Before installation, compare the replacement fastener with the original where possible.
Check:
- Diameter.
- Thread pitch.
- Length.
- Threaded length.
- Head type.
- Head diameter.
- Shoulder.
- Washer arrangement.
A replacement does not necessarily have to look visually identical if the alternative design is suitable for the mounting point, but the important dimensions and function still need to match.
Our How to Measure Motorcycle Bolts guide explains how these dimensions are checked.
4. Check the Thread Pitch
Do not identify a fairing fastener by diameter alone.
An M6 bolt, for example, is not completely identified by saying that it is M6.
The thread pitch also needs to match the female thread.
A wrong-pitch bolt may start into a clip, insert or aluminium thread before becoming unusually tight.
Never force it.
If there is unexpected resistance, remove the fastener and check the specification.
See our Motorcycle Metric Thread Pitch Reference Chart for more information.
5. Inspect the Plastic Before Refitting the Bodywork
Before installing the new fasteners, inspect the panel itself.
Look around each mounting hole for:
- Cracks.
- Splits.
- Enlarged holes.
- Stress marks.
- Distortion.
- Broken mounting tabs.
- Previous repair work.
- Damage caused by overtightening.
A new bolt will not repair an already damaged mounting point.
If a mounting tab is cracked or missing, deal with the underlying problem rather than relying on a larger washer or more tightening force to compensate.
6. Inspect the Fixing Behind the Fairing
Check what the bolt will screw into.
Look for:
- Stripped clip nuts.
- Loose captive nuts.
- Corroded threads.
- Damaged well nuts.
- Spinning inserts.
- Bent brackets.
- Damaged aluminium threads.
- Incorrectly positioned clips.
Replacing the visible bolt while leaving a damaged fixing behind the panel can leave the same problem in place.
Our Motorcycle Fairing Well Nuts, Clips & Washers Explained guide explains these components in more detail.
7. Replace Worn Well Nuts Before Fitting New Bolts
A well nut normally contains a flexible rubber or elastomer body and a threaded metal insert.
As the bolt is tightened, the insert is drawn towards the flange and the flexible body expands behind the mounting surface.
This helps secure the fitting.
A damaged well nut may:
- Spin with the bolt.
- Pull through the mounting hole.
- Fail to expand correctly.
- Sit loosely in the panel.
- Tear when tightened.
Replace a well nut if its body is:
- Split.
- Torn.
- Hardened.
- Perished.
- Severely distorted.
Also replace it if the threaded insert is loose or damaged.
8. Position Clip Nuts Correctly
Metal clip nuts need to align with the mounting hole.
Before inserting the bolt, check that the clip is:
- Fully seated.
- Straight.
- Positioned over the correct hole.
- Not badly corroded.
- Not distorted.
If the clip sits several millimetres out of alignment, do not use the bolt to drag it into position.
That can cross-thread or distort the fixing.
Adjust the clip or investigate why the panel and bracket are not lining up correctly.
9. Fit Washers, Grommets, Collars & Spacers in the Correct Order
Small supporting components can be easy to overlook during reassembly.
A motorcycle fairing mounting may use a sequence such as:
bolt → washer → fairing → grommet/collar → mounting point
Another position may use:
bolt → fairing → spacer → clip nut
The exact arrangement depends on the motorcycle.
Do not assume that:
- Every washer is interchangeable.
- A collar is optional.
- A spacer can be left out.
- Several loose washers are equivalent to a proper spacer.
Our Motorcycle Washers, Spacers & Collars Explained guide explains why these components matter.
10. Why Collars Matter Around Plastic & Rubber
A metal collar may pass through a rubber grommet or fairing mounting point.
Depending on the design, it can help control how far the fixing compresses the surrounding material.
Without the collar, continued tightening may compress the grommet or plastic much further than intended.
This can contribute to:
- Cracked bodywork.
- Crushed rubber components.
- Distorted panels.
- Incorrect spacing.
- Poor alignment.
Do not discard a collar simply because it looks like an unnecessary metal tube.
11. Check Shoulder Bolts Carefully
Some motorcycle fairing bolts contain a smooth shoulder between the head and threaded section.
The shoulder may:
- Locate the panel.
- Pass through a grommet.
- Work with a collar.
- Control clamping depth.
- Maintain clearance.
Replacing a shouldered fairing bolt with an ordinary fully threaded fastener can change how the mounting behaves.
See Motorcycle Shoulder Bolts Explained if the original fastener has an obvious unthreaded section.
12. Align the Fairing Before Inserting the Bolts
Position the panel so that its mounting holes line up naturally with the motorcycle.
Before inserting fasteners, check that:
- Adjacent panels are correctly positioned.
- Locating tabs are engaged.
- Wiring is not trapped.
- Rubber grommets are seated.
- Spacers are present.
- Brackets are not bent.
- No neighbouring bolt has been fitted in the wrong position.
A correctly positioned panel should generally not require significant bolt force simply to make its holes line up.
Do Not Use Fairing Bolts to Pull Panels Into Alignment
This is one of the most important rules when learning how to fit motorcycle fairing bolts.
If a mounting hole is significantly out of position, investigate why.
Possible causes include:
- A missing spacer.
- A wrong-length bolt in another position.
- Incorrect panel overlap.
- A bent mounting bracket.
- A broken mounting tab.
- Trapped wiring.
- Incorrectly seated grommet.
- Previous accident damage.
- Aftermarket bodywork with different dimensions.
Using the bolt as a pulling tool can concentrate substantial stress around the plastic mounting hole.
That can contribute to cracking either immediately or later in service.
13. Start Motorcycle Fairing Bolts by Hand
Where access allows, begin the thread by hand.
The fastener should enter smoothly.
If it becomes unexpectedly difficult to turn before the panel has started to clamp, stop.
Possible causes include:
- Wrong thread pitch.
- Cross-threading.
- Poor alignment.
- Damaged threads.
- Corrosion.
- Incorrect bolt.
- Misaligned clip nut.
Do not use a tool to force a bolt through unexpected resistance.
This is particularly important where the fixing screws into aluminium.
See Motorcycle Bolts Into Aluminium for more information.
14. Do Not Fully Tighten the First Bolt Immediately
Where several fasteners secure the same panel, it is usually useful to start the relevant bolts before final tightening unless the manufacturer specifies a different procedure.
This allows small positional adjustments while the panel settles into place.
A typical approach is:
- Position the panel.
- Start the first bolt.
- Leave it sufficiently loose for alignment.
- Start the remaining mounting bolts.
- Check panel gaps and alignment.
- Follow any specified tightening sequence.
- Tighten the fixings using the correct procedure.
Fully tightening one corner before the other mounting points are aligned can pull the panel out of position.
15. Check Panel Gaps Before Final Tightening
Before final tightening, look at the complete bodywork assembly.
Check that:
- Panel gaps are reasonably even.
- Tabs are correctly engaged.
- Overlapping panels sit in the correct order.
- No edge is trapped beneath another panel.
- The bodywork is not contacting the exhaust or another hot component.
- Wiring and hoses are not pinched.
- Nothing interferes with steering or suspension movement.
If the panel suddenly requires force to sit correctly, recheck the mounting arrangement.
16. Understand How Washers Protect Plastic Bodywork
Plastic panels can be sensitive to concentrated loads.
Depending on the original design, a washer or wider bolt head can distribute force over a larger area than a small head acting directly on the plastic.
However, this does not mean that adding the largest washer available is always better.
An oversized washer may:
- Interfere with a recess.
- Sit on a curved section.
- Prevent correct panel seating.
- Contact adjacent bodywork.
Use the washer specified or appropriate for the mounting arrangement.
17. Fit Motorcycle Fairing Bolts Into Well Nuts Carefully
Well nuts require enough tightening to secure the fitting and create the intended expansion behind the panel.
They do not require unlimited tightening force.
Excessive tightening can:
- Tear the rubber.
- Pull the insert through the body.
- Damage the thread.
- Distort the flange.
- Crack the surrounding panel.
If the bolt keeps turning rather than securing the fixing, stop and inspect the well nut.
The solution may be a replacement well nut rather than more tightening.
18. Do Not Overtighten Motorcycle Fairing Bolts
Motorcycle fairing fixings are not generally tightened like heavily loaded structural bolts.
Overtightening can damage:
- Plastic mounting holes.
- Well nuts.
- Rubber grommets.
- Clip nuts.
- Aluminium brackets.
- Captive threads.
- Washers.
- Bolt drives.
The aim is to secure the bodywork using the intended mounting arrangement.
More torque does not automatically make a fairing panel more secure.
How Tight Should Motorcycle Fairing Bolts Be?
There is no universal torque value for every motorcycle fairing bolt.
The correct procedure can depend on:
- Bolt diameter.
- Thread pitch.
- Bolt material.
- Threaded component.
- Washer arrangement.
- Well nut.
- Rubber mounting.
- Panel material.
- Manufacturer design.
Where the motorcycle manufacturer provides a torque value or fitting procedure, use it.
Do not copy a torque figure from a different motorcycle simply because the bolt looks similar.
For more information, see our Stainless Steel Motorcycle Bolt Torque, Anti-Seize & Galling Guide.
19. Do Not Ignore a Bolt That Bottoms Out
A fairing bolt can feel tight without actually clamping the panel.
A bolt that is too long may bottom out in a blind hole before the correct components are secured.
Possible signs include:
- The bolt becomes solid unexpectedly.
- The panel remains loose.
- A washer can still move.
- The fixing feels tight but there is visible movement in the bodywork.
Do not continue applying more force.
Check the bolt length and mounting depth.
20. Do Not Add Random Washers to Correct the Wrong Bolt Length
Adding the washer specified by the original design is correct.
Stacking random washers solely to make an excessively long bolt fit is different.
Doing so can alter:
- Thread engagement.
- Head position.
- Bearing area.
- Panel spacing.
- Appearance.
Use the correct bolt length instead.
21. Check Before Applying Threadlocker
Do not automatically use threadlocker on every motorcycle fairing bolt.
Some fixings may require it.
Many do not.
An unsuitable product can also create compatibility concerns with some plastics or elastomers.
Threadlocker can additionally make later removal more difficult, particularly where the bolt screws into a small clip or insert that may rotate.
Follow the motorcycle or component manufacturer’s instructions.
Our Threadlocker vs Anti-Seize on Motorcycle Bolts guide explains the difference between common thread treatments.
22. Do Not Apply Anti-Seize Automatically
Anti-seize may be useful in certain applications, but it is not an automatic requirement for every fairing bolt.
Motorcycle fairing fasteners can screw into several different materials and fixing types.
Anti-seize also changes thread friction and therefore can alter the relationship between tightening torque and clamp load.
It can also spread onto:
- Visible paint.
- Plastic.
- Rubber components.
- The surrounding bodywork.
Use it only where appropriate for the actual fixing and fitting procedure.
23. Stainless Steel Motorcycle Fairing Bolts
304 stainless steel is commonly used for suitable motorcycle bodywork fasteners because it provides good corrosion resistance and a clean appearance.
However, a stainless steel bolt still needs to match the original mounting requirements.
Check:
- Thread.
- Pitch.
- Length.
- Head geometry.
- Shoulder.
- Washer arrangement.
- Supporting hardware.
Stainless steel material alone does not prove that a bolt is a suitable replacement.
For more information about fastener materials, see Motorcycle Bolt Materials Explained.
24. Take Care With Aluminium Mounting Threads
Some fairing fixings screw into aluminium brackets, frame components or other aluminium parts.
These threads can be damaged by:
- Cross-threading.
- Incorrect pitch.
- Overtightening.
- Excessively long bolts.
- Dirty or damaged threads.
Start the fastener correctly and stop if unexpected resistance occurs.
Do not rely on extra tightening force to overcome a problem.
25. Aftermarket Fairings Need Extra Checking
Aftermarket or replacement bodywork may not reproduce every OEM dimension exactly.
Differences can include:
- Panel thickness.
- Hole diameter.
- Mounting-hole position.
- Tab thickness.
- Recess depth.
- Panel shape.
The original fastener arrangement therefore still needs checking.
Do not assume that an OEM-length bolt is automatically correct simply because the replacement panel was designed for the same motorcycle.
Likewise, do not compensate for poor alignment by tightening the panels together forcibly.
26. Remove Seized Fairing Bolts Carefully
If the existing fastener is seized or rounded, remember that the force used to remove it can be transferred into relatively fragile bodywork.
Consider what sits behind the bolt.
It may be:
- A rubber well nut.
- A clip nut.
- A captive nut.
- An aluminium bracket.
- A threaded frame component.
A seized clip nut may rotate.
A worn well nut insert may spin.
Excessive leverage can crack a mounting tab.
See How to Remove Seized, Stuck & Rounded Motorcycle Bolts before applying increasingly aggressive removal methods.
27. Replace Damaged Fairing Fasteners
Inspect removed bolts before reusing them.
Consider replacement if the fastener has:
- Badly damaged threads.
- Significant corrosion.
- A severely rounded drive.
- Galling.
- Distortion.
- Other obvious damage.
Also inspect the supporting fixing.
A new bolt fitted into a stripped clip or torn well nut will not correct the assembly.
See When Should Motorcycle Bolts Be Replaced? for a fuller inspection guide.
Common Mistakes When Fitting Motorcycle Fairing Bolts
Common mistakes include:
- Mixing different bolt lengths.
- Using the wrong thread pitch.
- Omitting a washer.
- Losing a collar.
- Leaving out a spacer.
- Reusing a badly damaged well nut.
- Installing a bent or corroded clip nut.
- Starting the bolt at an angle.
- Using a bolt to pull the panel into alignment.
- Fully tightening one bolt before the remaining holes are aligned.
- Overtightening plastic bodywork.
- Adding threadlocker automatically.
- Adding anti-seize automatically.
- Ignoring damaged mounting tabs.
- Compensating for the wrong bolt length with random washers.
Avoiding these mistakes is often more important than simply buying a new set of bolts.
Final Checks After You Fit Motorcycle Fairing Bolts
Once the bodywork has been installed, check that:
- Every intended mounting point is secured.
- The correct washers and collars are present.
- Well nuts and clips are seated correctly.
- The panel is not visibly crushed around any bolt.
- Mounting holes are not distorted.
- Panel gaps are acceptable.
- Nothing is trapped beneath the bodywork.
- No wiring or hose has been pinched.
- The fairing does not interfere with steering.
- The bodywork is clear of tyres and other moving components.
- Panels are not contacting hot components where they should not.
- The bodywork is secure without abnormal movement.
If something looks wrong after installation, investigate before riding.
Frequently Asked Questions
Should Motorcycle Fairing Bolts Be Very Tight?
Not necessarily.
The purpose is to secure the bodywork using the intended fixing arrangement.
Plastic panels, rubber well nuts, clips and collars should not be treated like a large structural bolted joint.
Use the motorcycle manufacturer’s specified procedure where available.
Why Does My Fairing Crack Around the Bolt Hole?
Possible causes include:
- Previous damage.
- Overtightening.
- Missing washer.
- Missing collar.
- Incorrect spacer.
- Misaligned panels.
- A bolt being used to pull the bodywork into position.
- An unsuitable mounting arrangement.
Inspect the complete fixing rather than assuming the plastic alone is the problem.
Why Does My Fairing Bolt Keep Spinning?
The bolt may not be the problem.
Possible causes include:
- A spinning well nut insert.
- Stripped clip nut.
- Loose captive nut.
- Damaged female thread.
- Incorrect bolt.
Stop and inspect what sits behind the panel.
Can I Fit Stainless Steel Motorcycle Fairing Bolts?
304 stainless steel can be suitable for many motorcycle bodywork applications.
However, the replacement still needs the correct thread, length, head design, shoulder and supporting hardware.
Material alone does not determine suitability.
Do Motorcycle Fairing Bolts Need Threadlocker?
Not automatically.
Use threadlocker only where appropriate for the specific fixing and follow any manufacturer instructions.
Can I Use a Longer Fairing Bolt if I Add Washers?
The correct specified washer should be fitted where required.
Randomly adding washers to compensate for an incorrect bolt length is not a good substitute for selecting the correct fastener.
Should I Replace Old Well Nuts When Changing Fairing Bolts?
Replace them if they are damaged, loose, hardened, torn, spinning or no longer retaining the fixing properly.
A new bolt cannot restore a worn well nut.
How to Fit Motorcycle Fairing Bolts: The Simple Rule
The simplest rule is:
Align first. Start the threads correctly. Fit all required washers, collars, spacers and supporting fixings. Then tighten the panel without crushing or forcing it.
If a bolt has to be forced to make the bodywork fit, stop and find out why.
Correct motorcycle fairing fitting depends on the entire mounting arrangement rather than the visible bolt alone.
More Biker Bling Motorcycle Fastener Guides
This guide forms part of the Biker Bling technical information library.
For more information about fairing bolts, well nuts, clips, washers, shoulder bolts, thread pitch and replacement fasteners, visit our Motorcycle Fastener Guides & Technical Information Hub.
You can also use our Motorcycle Fastener Glossary for explanations of common bodywork and fastener terminology.
For general stainless bolt installation beyond motorcycle bodywork, see How to Fit Stainless Steel Motorcycle Bolts.
Find Motorcycle Fairing Bolts & Fastener Kits
Biker Bling supplies 304 stainless steel motorcycle fairing bolts and model-specific fastener kits for a wide range of makes, models and applications.
Depending on the individual product, kits may also contain relevant:
- Washers.
- Rubber well nuts.
- Clips.
- Other application-specific bodywork fixings.
Browse Biker Bling Motorcycle Fasteners →
Always check the individual product listing for exact motorcycle fitment, year coverage, fixing locations and kit contents.
Technical information prepared and reviewed by Biker Bling Limited. Learn how we research, measure and verify motorcycle fasteners.
Technical Information Disclaimer
The information on this page is provided as general educational guidance about fitting motorcycle fairing bolts and associated bodywork fasteners.
It does not provide a model-specific torque specification, fastening sequence or bodywork repair procedure and is not intended to replace the motorcycle manufacturer’s workshop manual, parts information, component manufacturer’s instructions or advice from a suitably qualified motorcycle technician.
Fairing designs, panel materials, bolts, well nuts, clips, washers, collars, spacers and mounting arrangements vary between motorcycles.
Where the motorcycle or component manufacturer specifies a particular fastener, supporting component, torque value, thread treatment or installation procedure, follow those requirements.
Do not force misaligned bodywork together or continue tightening a fastener that is cracking, crushing or otherwise damaging the panel or mounting structure.
If the correct mounting arrangement cannot be established confidently, obtain reliable model-specific information before installation.
Nothing on this page is intended to affect your statutory rights or to exclude or restrict any responsibility that cannot lawfully be excluded or restricted.